The Cover 1 Robber Press is a defensive play designed to mix tight man coverage with a lurking safety in the middle of the field. This play is built from the Dime 2-3 Sam formation, which allows for strong pass coverage while maintaining a balanced pass rush. The design positions a single deep safety over the top, with another safety dropping into a hook zone to disrupt short passes.
With six defensive backs on the field, this setup maximizes speed and versatility, making it difficult for the offense to exploit weaknesses. This play is particularly useful against Gun Bunch formations, as it applies pressure while keeping coverage tight. Additionally, the Cover 1 Robber Press works well in passing situations where the quarterback needs to make quick decisions. This defensive setup challenges the offense to make precise reads and execute under pressure.
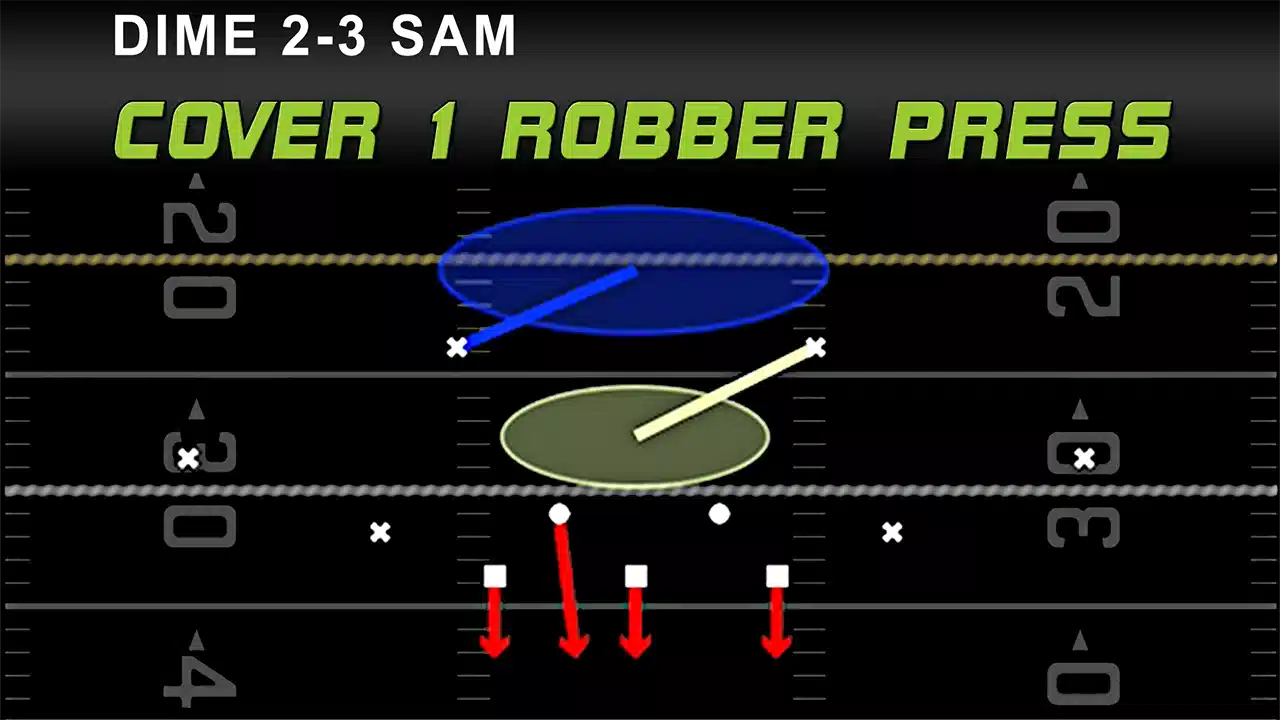
Play Diagram:
Playbooks Found In:
- 3-4
- Jaguars
- Raiders
- Vikings
Play Info:
Formation: Dime
Set: 3-2
Personnel: 2 DL, 3 LB, 6 DB
Coverage Type: Man
Coverage Shell: Cover 1
Blitz Type: Man
Gap Pressure: A
Pass Rushers: 4
Pass Defenders: 7
Defensive Assignments:
RE: Pass Rush
NT: Pass Rush
LOLB: Pass Rush
ROLB: Pass Rush
MLB: Man
DB1: Man
LCB: Man
SS: 3 Rec Hook
FS: Deep Zone Middle
DB2: Man
RCB: Man
Defensive Play Breakdown:
The Cover 1 Robber Press is a defensive strategy that emphasizes tight man-to-man coverage while utilizing a robber safety to disrupt passing lanes. The play begins with the cornerbacks pressing the receivers at the line of scrimmage to delay their routes. Meanwhile, the free safety provides deep help over the top to prevent any receivers from breaking free downfield. The strong safety moves into a hook zone, reading the quarterback’s eyes and looking to jump any short or intermediate throws.
The four-man pass rush applies steady pressure, with the linebackers responsible for covering their assigned targets. This design prevents easy checkdowns and forces the quarterback to hold the ball longer. Against Gun Bunch TE, the alignment can naturally counter quick out routes or deep crossing routes due to the press coverage. Additionally, the lurking safety in the middle helps counter drag routes, slants, and other short crossing patterns.
While the Cover 1 Robber Press is primarily effective against passing plays, it can also hold up against the run if the defensive user takes control of the strong safety. By stepping up into the A-gap, the safety can provide extra run support. However, it requires quick reactions to avoid getting caught out of position. The success of this play relies heavily on solid coverage skills and the ability to anticipate the quarterback’s decisions.
Key Strengths:
The Cover 1 Robber Press thrives in man coverage situations by disrupting quick passing reads and forcing the quarterback to make difficult throws. The press alignment slows down receivers and disrupts timing, giving the pass rush extra time to apply pressure. The free safety over the top ensures deep routes are covered, while the strong safety’s hook zone presence makes crossing routes harder to complete. This defensive setup works well against Gun Bunch and tight formations, limiting the effectiveness of quick slants and drag routes. Additionally, the play forces opponents to rely on perfect reads, increasing the likelihood of mistakes and turnovers.
Key Weaknesses:
One of the biggest weaknesses of the Cover 1 Robber Press is its vulnerability to quick outside-breaking routes and running back checkdowns. Since the defense is locked into man coverage, shifty slot receivers can create separation on quick cuts. If the press coverage fails, receivers can gain leverage downfield, forcing the free safety to cover too much ground. Additionally, the play can struggle against mobile quarterbacks if the defensive line fails to contain the edges. Without an immediate pass rush, the quarterback may extend the play and find open targets.
Situational Usage:
The Cover 1 Robber Press is best used in passing situations where the defense wants to apply pressure while maintaining strong coverage. This play excels on third downs when the offense needs to pick up yardage, making it difficult for receivers to get open quickly. It also works well inside the red zone, where the tighter field naturally helps limit deep threats. However, against strong run-heavy teams, this defense may require additional adjustments to avoid getting exploited on the ground. Overall, this setup is ideal for players who prefer aggressive man coverage schemes.
Five Madden Tips for Success:
- Use press coverage to disrupt timing and force the quarterback into difficult throws.
- Manually control the strong safety to bait throws into the hook zone and create turnover opportunities.
- If struggling with quick routes, adjust individual coverage assignments to shade defenders inside or outside.
- Against mobile quarterbacks, set QB contain to prevent them from escaping outside the pocket.
- The Cover 1 Robber Press is effective against Gun Bunch, but watch for deep corner routes that may exploit single coverage.
Quick Set-Up:
- Set coaching assignments to base align.
- Set coaching assignments hook zones to zero.
- Call press man coverage.
- QB Contain.
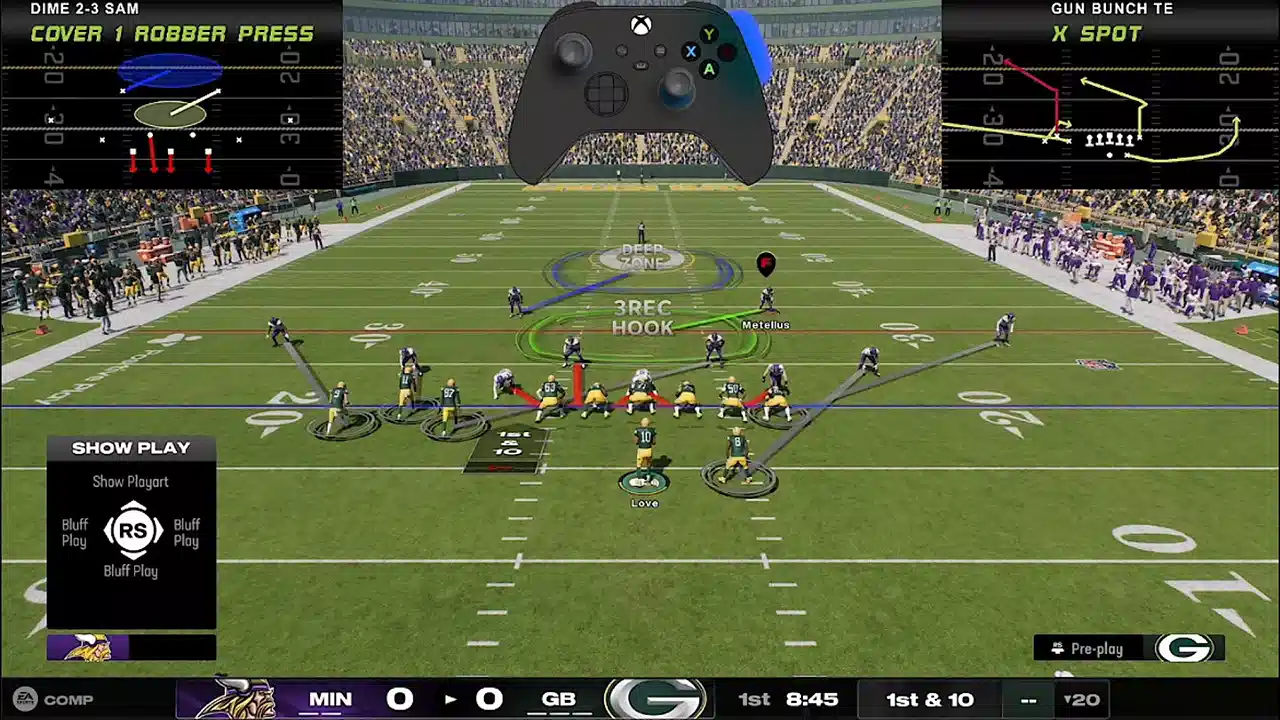
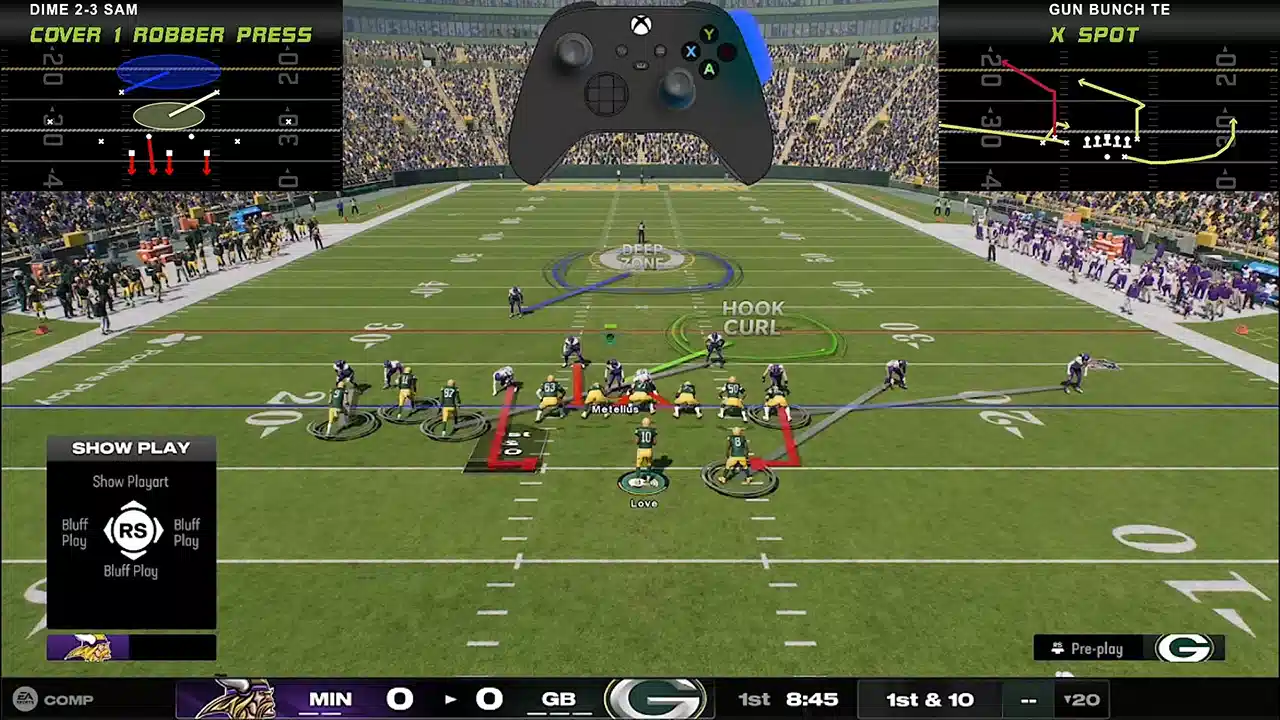
- Take control of the strong safety and hot route him into a hook curl.
- Move the strong safety between the left guard and center.
Blitz Breakdown:
The blitz I want to demonstrate utilizes the Dime 2-3 Sam Cover One Robert Press. This setup provides B-gap pressure from the strong safety, but requires manual control to rush him. If manual rushing isn’t your preference, this blitz may not be suitable for you, but I’ll outline the steps involved.
First, take control of the strong safety, ensuring he has speed, as a faster safety increases your chances of reaching the quarterback. I’ll guide you through the setup so you can implement it easily in practice mode.
Start by calling press man coverage to position your defenders closer to the line. Be mindful that while in base alignment, these defenders may shift wider to the right against a Gun Bunch Tight End formation. This positioning can allow quick passes to the tight end or other routes, so consider whether to use base alignment in this scenario.
Next, set the two defensive ends to QB contain to prevent the opponent from rolling out. This adjustment helps maintain pressure on the quarterback.
Then, hot route the strong safety to a hook curl. It’s important to do this while he’s positioned on the right side of the center. If you hot route him while on the left, it alters the blitz’s effectiveness. When you position him in the A gap between the center and left guard, ensure that his hook curl moves correctly to the right when the ball is snapped, enabling quicker pressure on the quarterback.
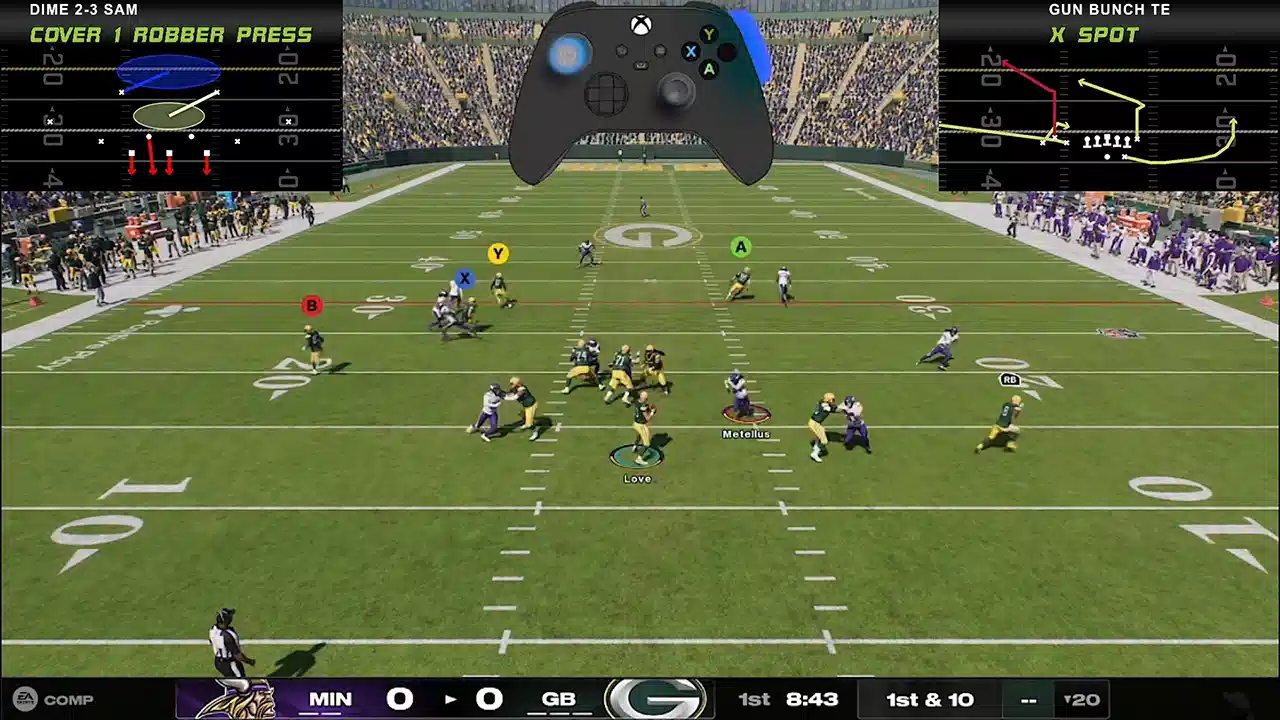
Upon the snap, manually rush through the gap between the right guard and right tackle to pursue the quarterback effectively. You’ll notice the blitz generates pressure quickly if executed correctly.
To reiterate the setup: first, call press man coverage, followed by QB contain. Then, control the strong safety, hot route him to a hook curl while ensuring he’s not to the left of the center, and move him into the A gap.
Consider the positioning of the slot receiver as well; the baseline alignment may leave defensive players out of position, requiring you to adjust their placements to ensure coverage.
As we execute this setup, remember to aim for the gap efficiently. You want to move directly between the right guard and tackle to minimize your distance to the quarterback. Delaying your angle can extend the time it takes to reach him, which is critical in a game with tight timing.
Keep in mind that while executing this blitz, a quick pass may expose weaknesses in your coverage, so balance your alignment decisions carefully. Overall, this blitz showcases solid coverage in man assignments along with a deep defender in the middle. Consider incorporating this strategy into your gameplay.
Video Breakdown:
Final Thoughts:
The Cover 1 Robber Press is an aggressive defensive play that thrives on man coverage and quick pressure. This setup forces the quarterback to make precise reads under pressure, increasing the chances of turnovers. While the free safety provides deep help, the strong safety’s hook zone presence helps defend against short throws. This defensive scheme is excellent against Gun Bunch formations but requires adjustments against outside routes. Players who enjoy user-controlling the strong safety will find this play highly effective. However, those who struggle with press coverage timing may need to refine their execution. The Cover 1 Robber Press is a strong option for defensive players who want to shut down quick passes and create chaos for opposing quarterbacks.
FAQ:
Q: What makes Cover 1 Robber Press different from other Cover 1 defenses?
A: It uses a strong safety in a hook zone to disrupt passing lanes and confuse the quarterback.
Q: Is this play effective against mobile quarterbacks?
A: It can be, but QB contain adjustments are necessary to prevent scrambling.
Q: How do I counter quick passes with this play?
A: Press coverage and user-controlling the strong safety help slow down short routes.
Q: When should I use this play?
A: Use it in passing situations, especially on third downs and in the red zone.
Q: What personnel should I prioritize for this defense?
A: Fast defensive backs and a strong safety with good play recognition are key.


